
Are you a fan of rich, flavorful coffee? If so, making your own cup of drip coffee is the perfect way to get that delicious cup every morning. With some basic tools and simple instructions, anyone can make quality drip coffee right at home. So, let’s get started with learning how to make drip coffee for yourself…
Brewing your own drip coffee is easier than it may seem. All you need is some good quality beans and your favorite method to extract the flavor – be it a French press or a traditional automatic machine.
What is Drip brew coffee? What is poured over coffee?
Drip brewed coffee [1] is the most common way of brewing in the United States. It involves placing ground coffee beans into a filter basket, which is then placed over a carafe or other container with hot water. As the water passes through and blends with the fresh grounds, it creates an aromatic cup of brewed coffee that can be enjoyed black or with cream and sugar.
Pouring over coffee or brewed coffee [2] is a similar method, but involves manually pouring hot water over the grounds in order to extract more flavor from the beans. This process can be done with a simple pour-over cone device (available at most kitchen supply stores) or with an automated machine.
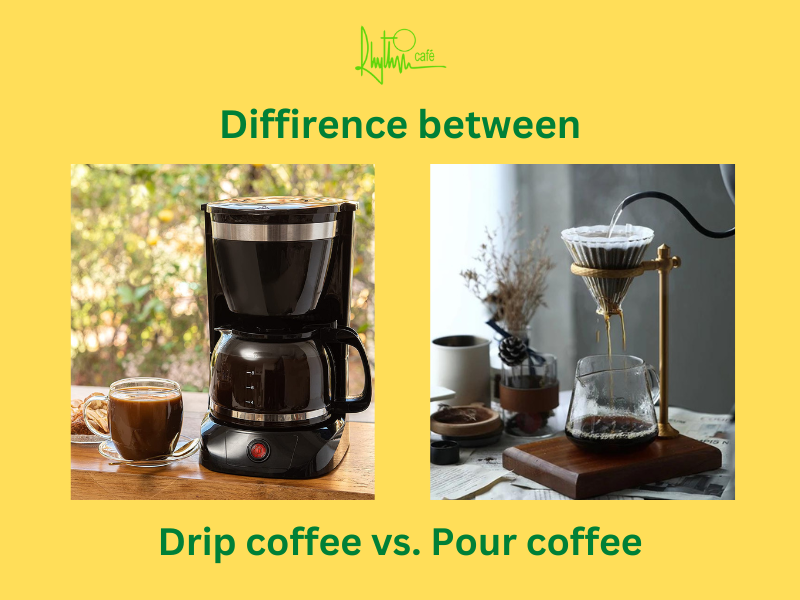
The key difference between drip brew and pour over coffee is that the latter requires more manual labor, but yields richer and more intense flavors.
What is a coffee dripper?
A coffee dripper is a device used to brew drip coffee. It consists of a filter basket with holes in the bottom which sits on top of a carafe or other container filled with hot water. As the hot water passes through the grounds, it extracts the flavor and creates a delicious cup of drip brew.
What type of coffee should you use?
When making drip coffee, you should use a medium to dark roast for best results. You can also experiment with different types of beans, such as Arabica or Robusta, for a range of flavors. Make sure to grind your beans freshly before every brewing session and avoid pre-ground coffees as they don’t extract flavor as effectively.
How to make drip coffee?
Equipment
What equipment do you need? You will need to prepare:
- Freshly roasted beans
- A grinder
- Filter paper or reusable filter
- Hot water
- A coffee dripper
Ingredients and Ratio for drip coffee
What ratio of coffee to water should you use? The recommended ratio for making drip coffee is 1-2 tablespoons (7-14 grams) of ground coffee per every 6 ounces (177 ml) of hot water.
Instruction (Step)
Here are the basic steps to making your own drip coffee:
Step 1: Measure your beans
The first step in making drip coffee is to measure out the desired amount of freshly roasted coffee beans into a filter paper or reusable filter basket. The ideal ratio for drip coffee is 16-18 grams of ground coffee per 8 ounces of water.
Step 2: Grind the beans
Grinding beans at home is the best way to ensure that all the flavor and aroma from the beans are retained. By grinding your beans from fresh just before each brew you can maximize the deliciousness in every cup. Ground coffee starts losing its oils minutes after being ground, so store-bought pre-ground coffee will never be as flavorful as what you can produce yourself. This is why many dedicated coffee aficionados have a special grinder set up in their kitchen, ready to turn freshly roasted beans into perfect grounds whenever they desire it.
Choosing a quality coffee grinder is integral to enjoying delicious coffee. Burr grinders are your best bet, as they create an even grind size, allowing more flavor and caffeine to pass through into the cup. A blade grinder can’t give uniform grinds, often producing too many fat particles that will float around instead of sinking down in the filter, making the coffee cup murky and bitter. However, even with a good quality burr grinder, you should be sure to clean your grinds regularly – if rubble builds up on the inside it can lead to overheating, which will burn your coffee beans and leave an unpleasant taste.
Step 3: Preheat your water
Once you’ve ground your beans, preheat your water. Fill up a kettle or pot with filtered or spring water and heat it until it boils. As soon as the water starts to boil, turn off the heat and let it cool for one minute before using it. This will prevent the coffee from becoming too bitter due to over-extraction of flavors.
Note: Tap water is not bad, it contains too many minerals that show in the cup of your coffee. Distilled water isn’t recommended either; it doesn’t contain any minerals and can make your drink taste dull and flat.
The ideal solution is one that gives you the best of both worlds and removes chlorine or other undesirables so your coffee tastes just right. Filtering is one way of achieving this and there are many solutions on the market to suit any budget. Bottled spring water is also a great choice because it combines the necessary minerals with great-tasting purity and is ready-made for you to use whenever you want.
Step 4: Place filter and grounds into the coffee maker
Once your water is ready, it’s time to place the filter and ground coffee in the top of your coffee maker. Put two tablespoons of freshly ground coffee per cup desired into the filter, then pour some of your preheated water over the grounds. This will wet them enough so that they don’t stick together when you pour more water in later.
Step 5: Pour water slowly
Begin pouring your hot water over the grounds in a slow and steady stream, making sure to evenly saturate all of the grounds. This will help ensure a flavorful and balanced cup of drip coffee. Avoid pouring too quickly or the water may overflow and make a mess!
Once all the water is added, stir gently so even extraction occurs throughout the pot. If you have an electric coffeemaker that has a warming plate, turn it on now and place your carafe on top.
Step 6: Let coffee brew
After you’ve poured all of your water, let it brew for four to five minutes before turning off the heat. This will allow the grounds to steep and give your coffee its maximum flavor potential. If you want a stronger cup, then let it brew for an extra minute or two – but be careful not to over-extract as this can make your cup bitter.
Step 7: Remove the filter and enjoy
Once the timer goes off, turn off the heat and remove the filter with your grounds. Pour yourself a cup of freshly brewed coffee and enjoy! Serve it up hot with a splash of cream or milk for a deliciously smooth cup. Remember to store any remaining coffee in an airtight container or carafe, either in the fridge or on the countertop at room temperature, for up to two days. Enjoy!
The 7 Rules for Perfect Drip Coffee Brewing
1- Choose the right filter
A key factor in a great cup of java is the type filter used. Filters vary with materials, shape and size, each influencing the body and taste of the brewed beverage.
Paper filters are very dense allowing them to block out more solids that might otherwise make it into your cup. The downside to this, however, is that the oils which give coffee its flavor can also be trapped in this filter meaning that if you choose to go with paper you could be missing out on some full-bodied flavor. It is suggested that you stay away from cheap paper filters and use brands like Melitta or Filtropa, as they ensure better quality results in brewing.
Mesh filters are a great alternative to paper filters when it comes to making your morning cup of joe. With mesh filters, you need to grind the beans more coarsely and have a good, even grinder in order for them to work properly.
2- Drink your coffee right away
Once your coffee is brewed, it’s important to drink it as soon as possible to enjoy the best flavor. Coffee loses its flavor and aroma quickly and can taste bitter if left sitting too long. Studies have found that letting coffee sit for too long results in a decrease of its essential antioxidant components, which are necessary for providing energy and mental focus. Therefore, if you are looking to reap the maximum rewards of your daily caffeine dose, drink your coffee right away!
If you’re not able to consume your coffee right away then make sure to store it in an airtight container or carafe at room temperature, or in the refrigerator for up to two days.
3- Use freshly roasted beans
When it comes to making coffee, freshness is key! Coffee beans should be purchased in small quantities and stored properly in an airtight container away from heat and humidity. Proper storage will ensure that the flavor of your coffee remains intact and won’t be compromised by outside elements.
4- Presoak the grounds
Before you brew your coffee, it’s important to presoak the grounds. This helps get rid of some of the bitterness and allows for even extraction of flavor during brewing. To do this, simply measure out your grounds into a filter and pour enough hot water over them to wet them down. You don’t need to use all of the water, just enough to ensure that the grounds are saturated. Let them sit for about 30 seconds before beginning the brewing process.
5- Grind your beans just before brewing
Coffee is best when freshly ground, so it’s important to grind your beans right before you begin the brewing process. If you don’t have a quality grinder at home, you can easily purchase pre-ground coffee. It’s important to note that pre-ground coffee will not give you the same quality of flavor as freshly ground beans, but in a pinch it will do.
6- Adjust brewing time & temperature
The last step in making a perfect cup of drip coffee is adjusting the brewing time and temperature. Brewing times vary depending on the type of coffee you’re making, but as a general rule it’s best to brew your beans between 195-205 degrees Fahrenheit. The ideal brewing time is also between 4-6 minutes depending on the desired strength of the beverage.
7- Clean and maintain your coffee maker regularly
Finally, it’s important to clean and maintain your coffee maker regularly. This will help ensure that all of the components are functioning properly, helping you get the best cup of coffee every time. Regularly cleaning with a vinegar-based solution or other specialty coffee equipment cleaner can help keep your machine in top shape.
Following these seven simple rules for perfect drip coffee brewing will ensure that you get the most flavorful cup every time. With a little bit of practice and patience, you’ll be making amazing cups of coffee in no time!
How To Clean Drip Coffee Makers
Keeping your drip coffee maker clean is essential for making sure you get the best flavor from each cup. To maintain your machine, rinse out the carafe and filter basket after every use and give a more thorough cleaning once a month to prevent buildup of oil, grounds, or calcium deposits.
To deep clean your machine, run white vinegar through the carafe with water in a 1:1 ratio. Allow it to brew for about 10 minutes, then rinse thoroughly and run a few more cycles of plain water to get rid of any vinegar residue. For an even deeper clean, you can disassemble the parts and soak them overnight in hot, soapy water before rinsing.
FAQs How to Brew Good Drip Coffee
Which pouring technique is best?
For the best flavor, you should pour the hot water slowly and evenly over the grounds in a spiral-like motion. This will help ensure that all of the grounds are properly saturated and brewed without any wasted water or overflow.
How much coffee should I use per cup?
The ideal ratio for making drip coffee is 2 tablespoons (14 grams) of coffee for every 6 ounces (177 ml) of hot water. This can be adjusted depending on the strength you prefer, but this is a good starting point.
Is drip coffee better than pour over?
It depends on your preference – both methods produce a quality cup of coffee, it just comes down to what you like the best. Drip coffee is more convenient and typically faster to make, while pour over gives you more control over the brewing process.
No matter how you choose to brew your coffee, following these seven simple rules for the perfect cup will help you get the most out of your beans. With a little bit of practice, you’ll be enjoying delicious cups of coffee in no time!
Is Drip Coffee Better Than Keurig?
Both drip coffee and Keurig offer convenience and great flavor, but your preference will ultimately depend on what you’re looking for. Drip coffee is a quicker process that produces a consistent cup of coffee, while the Keurig offers more variety and customization. Ultimately, it comes down to personal preference.
The best way to decide which method is best for you is to experiment with both and see what you like the most. Whichever one you choose, following the 7 rules above will help ensure that your coffee tastes great!
Is Drip Coffee Bad For You?
No, drip coffee is not bad for you. In fact, it can even provide some health benefits! Coffee contains antioxidants that can help reduce inflammation and protect against diseases like cancer and type 2 diabetes. Just be sure to drink it in moderation – the Mayo Clinic recommends no more than 400 mg of caffeine (about 4 cups) per day.
What Is Automatic Drip Coffee?
Automatic drip coffee is a type of coffee maker that brews the beverage by heating water and dripping it over ground coffee beans in a filter. It is one of the most popular ways to make coffee, as it requires little effort to produce consistently delicious cups. With the right technique and ingredients, you can easily make great-tasting drip coffee at home.
Conclusion
How to make drip coffee? Drip coffee is a simple and easy way to make great-tasting coffee in your own home. With the right technique and ingredients, you can craft delicious cups of coffee every time. Make sure to keep your machine clean, use the proper ratio of grounds to water, and pour the hot water slowly and evenly. With practice, you’ll soon be enjoying barista-level cups of coffee every time!
Happy brewing!

Hi, I’m Zelda Kain. I love coffee – probably a little too much! I work as an admin at Rhythmcafe, a local spot renowned for its fresh ingredients and delicious coffee. I also review home appliances such as grinders, espresso machines, and more. I’ve tried out almost every model available, so if you’re in the market for any of these items be sure to check out my reviews!