
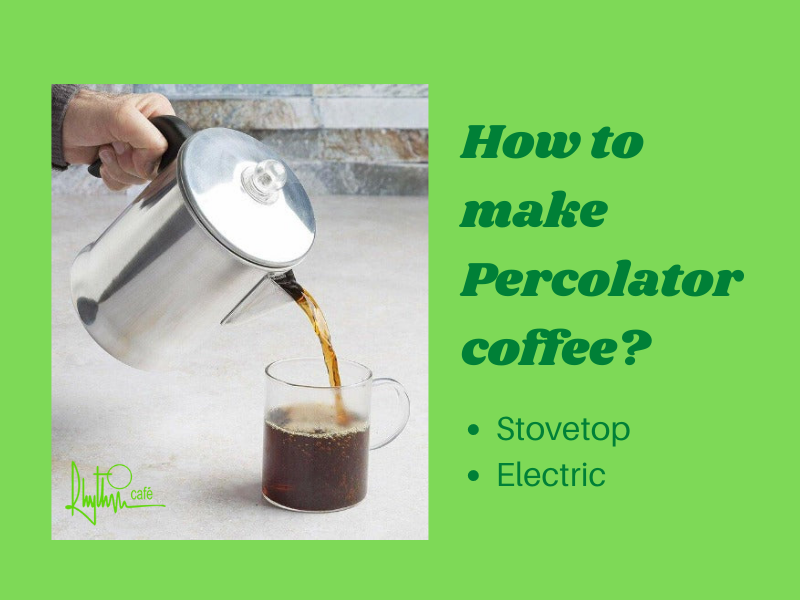
Do you want to make the perfect cup of delicious, fresh-brewed morning coffee? The good news is that it’s easier than you might think – all you need is a percolator! Today I’m going to show you how to make percolator coffee. With its simple setup and overall ease of use, making great-tasting coffee in a percolator is one of the oldest and most classic methods around. Whether you’ve never used one before or simply want to brush up on the basics, this guide will cover everything related to how to make delicious percolator coffee every single time. Let’s get brewing!
Percolator vs. Other Brewing Methods
When it comes to brewing coffee, there are several different methods you can use. The most popular include French press, pour over, and of course percolator. Each method has its own advantages and disadvantages, but generally speaking the percolator produces a stronger, fuller-bodied cup of coffee compared to the alternatives. Additionally, the process of making percolator coffee is much simpler than that of other methods, requiring no special equipment or skills. For these reasons and more, the percolator remains a popular choice for many coffee lovers.
What is a Coffee Percolator?
A percolator [1] is a type of coffee maker that works by using gravity to continuously draw hot water up through the grounds and then back into the reservoir below. This process produces a stronger, fuller-bodied brew compared to other methods such as French press or pour over.

Difference Between a Percolator vs. a Moka Pot
The main difference between a Percolator and a Moka Pot is in the brewing process. A moka pot uses pressure to force water through the coffee grounds, resulting in an espresso-like brew. On the other hand, a percolator simply boils the water over and over again, creating a much milder cup of coffee.
>> See more: Different Types of Coffee Makers
What is the advantage of using a percolator?
Using a percolator has several advantages. First, it eliminates the need for electric coffee makers or other complicated machines. It also allows you to control how strong your brew is and the type of flavor you’re getting. Additionally, percolators are often much cheaper than their electric counterparts and they don’t require any special accessories or filters.
How to make coffee in a Percolator?
Ingredients
- Whole coffee beans of your choice
- Coffee grinder
- Water
- Spoon for measuring coffee
- Stovetop percolator
- Your favorite mug
Directions

How to make percolator coffee by steps detail:
Step 1: Measure and grind the coffee beans
Using a coffee grinder, measure out 1/4 cup of fresh coffee beans and grind them to a medium-coarse consistency. This is typically the same coarseness you would use for a French press or drip coffee maker.
Step 2: Place the filter basket in the percolator
Place the filter basket inside the basket holder in the percolator. Make sure it is securely attached.
Step 3: Add water to the pot
Fill the percolator pot with cold water up to about an inch below the rim of the basket holder. Do not overfill, as this could cause overflow or gurgling during brewing.
Step 4: Add the coffee grounds
Add the pre-ground coffee grounds to the filter basket. Do not overfill as this could cause overflow during brewing.
Step 5: Place the pot on the stove and start brewing
Place the percolator onto a stove top burner set to medium heat. As soon as the water starts to boil, the percolator will start to make gurgling noises. This is a sign that the coffee grounds are being infused with hot water and releasing its flavor.
Step 6: Remove from heat when finished brewing
Once you hear five or six gurgles in a row, turn off the heat and remove the percolator from the burner. Allow it to cool for a few minutes before serving.
Step 7: Serve and enjoy!
Carefully pour the brewed coffee into cups or mugs, making sure not to let any grounds escape the filter basket. Enjoy your freshly made percolator coffee with friends or family!
You now know how to make percolator coffee. With its simple setup and overall ease of use, making great-tasting coffee in a percolator is one of the oldest and most classic methods around. All you need is a percolator, some whole beans, cold water, and your favorite mug – simple as that! Enjoy your freshly brewed!
>> See more:
- How to make Turkish coffee
- How to make pumpkin cold foam
- How to make strong coffee
- How to remove coffee stains
6 Tips for Using a Percolator
1. Use fresh, quality beans
The flavor of your percolator coffee will depend on the quality of the beans you use. Be sure to purchase freshly roasted, specialty grade coffee beans for the best results.
2. Preheat the pot before adding water and grounds
Preheating the percolator pot before adding water and grounds will help speed up the brewing time. Simply fill the percolator with hot tap water before adding your coffee grounds and cold water for brewing.
3. Avoid boiling for too long
When making percolator coffee, it is important to avoid boiling for too long. This could cause the coffee to become bitter and overly concentrated.
4. Don’t overfill the filter basket
When filling the filter basket with coffee grounds, it is important to not overfill it. This could cause overflow during brewing and could ruin the flavor of your coffee.
5. Experiment with grind size
You can experiment with grind size to find what works best for you. A medium-coarse grind is often recommended, but you may find that a finer grind yields better results.
6. Clean your percolator right away
It is important to clean your percolator right after use. This will help prevent residue from building up inside the pot and ensure that your coffee tastes great every time. Use a mild cleanser, such as dish soap and warm water, for best results.
How long to let coffee percolate?
The length of time it takes to make your percolator coffee will depend on the strength of brew you prefer. Generally, 8-10 minutes is a good starting point for brewing a pot of percolator coffee. If you find that the taste isn’t strong enough for your liking, simply let it percolate for an extra minute or two. On the other hand, if your coffee is too strong, reduce the brewing time by a minute or two to get it just right. With some trial and error, you’ll soon figure out how long to let your percolator coffee brew for optimum flavor.

How to Clean a Percolator?
Cleaning a percolator is an important part of the brewing process in order to ensure your coffee tastes great every time. After each use, be sure to remove and empty the filter basket. Then fill the reservoir with hot water and a small amount of soap and simmer for 5 minutes. Once finished, discard the soapy water and rinse the pot with clean water. Lastly, wipe down the exterior of the percolator with a damp cloth or paper towel. Regular cleaning will help keep your percolator in tip-top shape and ready for many cups of delicious coffee to come!
How to store a Percolated coffee?
Once brewed, it’s best to drink your percolator coffee within an hour or two. If you have any leftovers, store them in a sealed container in the refrigerator for up to three days. Alternatively, you can freeze leftover coffee and reheat it when needed. Just be sure not to overheat it as this will result in a bitter taste.
FAQs How to make percolated coffee
What is the best coffee for a percolator?
The best coffee for a percolator is whole bean coffee as this will give you the richest flavor and aroma. You can experiment with different varieties of beans to find the one that tastes best in your percolator.
What grind should I use for my percolator?
You should use a coarse grind for your percolator coffee. A coarse grind will allow water to flow more easily through the filter basket and result in a richer flavor. If you use a finer grind, your coffee may be too strong or feel gritty.
Should I pre-heat my percolator?
It’s not necessary to pre-heat your percolator before making coffee, however doing so may result in a stronger brew. To pre-heat your percolator, simply fill the reservoir with hot water and let it sit for a few minutes before adding the ground coffee.
Do you use a filter with a percolator?
Yes, you should always use a filter with your percolator. The filter helps keep the grounds from entering the pot and gives you a smoother cup of coffee. Most percolators come with a metal filter, although some models may require paper filters as well.
Can I use a paper filter in my percolator?
Yes, you can use a paper filter in a percolator, however it will result in a much weaker brew. If you prefer a stronger cup of coffee we recommend using the metal filter that comes with your percolator.
Can I make cold brew in my percolator?
Yes, you can use your percolator to make cold brew coffee. Simply grind your beans and place them in the reservoir. Fill with cold water and allow to steep overnight. In the morning, remove the filter basket, discard the grounds and enjoy your cold brew coffee!
How much coffee do you put in a percolator?
The amount of coffee you put in a percolator will depend on the size of your pot and how strong you like your brew. As a general rule, start with 2 tablespoons of ground coffee for every 6 ounces of water. You can adjust this ratio as needed to get the desired strength.
Can I use pre-ground coffee in a percolator?
Yes, you can use pre-ground coffee in a percolator. However, pre-ground coffee will not produce the same flavor and aroma as freshly ground beans. For the best results, we recommend using freshly ground coffee beans for your percolator brews.
How long do you let coffee percolate in a percolator?
The amount of time you let coffee percolate in a percolator will depend on how strong you want your brew. For most standard-sized pots, it’s best to let the coffee percolate for about 5 minutes. You may need to experiment with different brewing times to get the flavor just right. generally speaking, if the coffee is too strong, reduce the brewing time, if it’s too weak increase the brewing time.
What safety precautions should I take when using a percolator?
When using a percolator, it’s important to follow all safety precautions. Always make sure the pot is securely closed and never leave it unattended. Additionally, use caution when handling hot water or steam, as this can cause serious burns if not handled properly. Lastly, be sure to let your percolator cool before attempting to clean or store it.
Does percolated coffee have more caffeine?
Percolated coffee is not necessarily higher in caffeine than other types of brewed coffee. The amount of caffeine in a cup of percolated coffee will depend on the type of beans used and how long it’s been steeped. Generally speaking, however, you can expect to get about the same amount of caffeine from a cup of percolated coffee as you would from any other type of brew.
Conclusion
How to make percolator coffee? Making coffee with a percolator is easy and straightforward. Begin by filling the reservoir with cold water and adding 2 tablespoons of freshly ground coffee for every 6 ounces of water. Secure the lid and set your percolator on a heat source to begin brewing. Let it sit for 5 minutes or until you reach your desired strength, then remove the filter basket and discard the grounds. Finally, pour your freshly brewed coffee into a mug and enjoy! With just a few simple steps, you can have delicious percolated coffee any time.
Happy brewing!

Hi, I’m Zelda Kain. I love coffee – probably a little too much! I work as an admin at Rhythmcafe, a local spot renowned for its fresh ingredients and delicious coffee. I also review home appliances such as grinders, espresso machines, and more. I’ve tried out almost every model available, so if you’re in the market for any of these items be sure to check out my reviews!